If you run a mini-PC cluster, a DIY TrueNAS box, or a headless home server without enterprise IPMI/iDRAC, one bad kernel update or misconfigured firewall rule turns a five-minute fix into a physical trip with a monitor and keyboard.
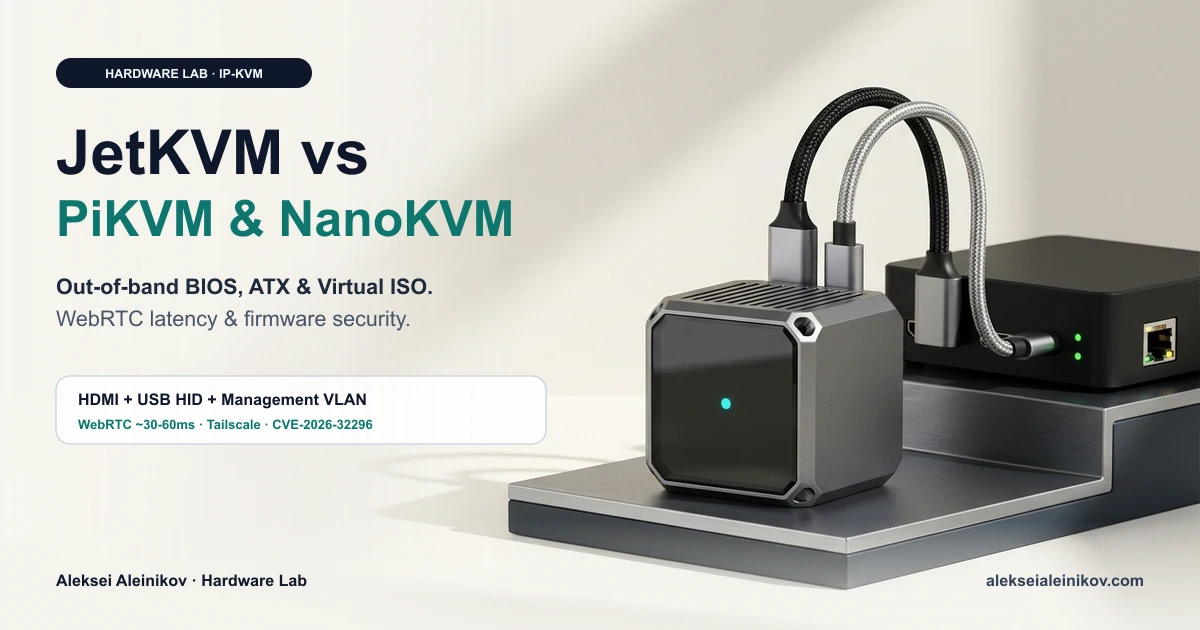
Hardware KVM-over-IP appliances solve that problem at the electrical layer — and the market has split into three distinct tiers: JetKVM (modern WebRTC value), PiKVM V4 (mature enthusiast standard), and Sipeed NanoKVM (ultra-budget RISC-V).
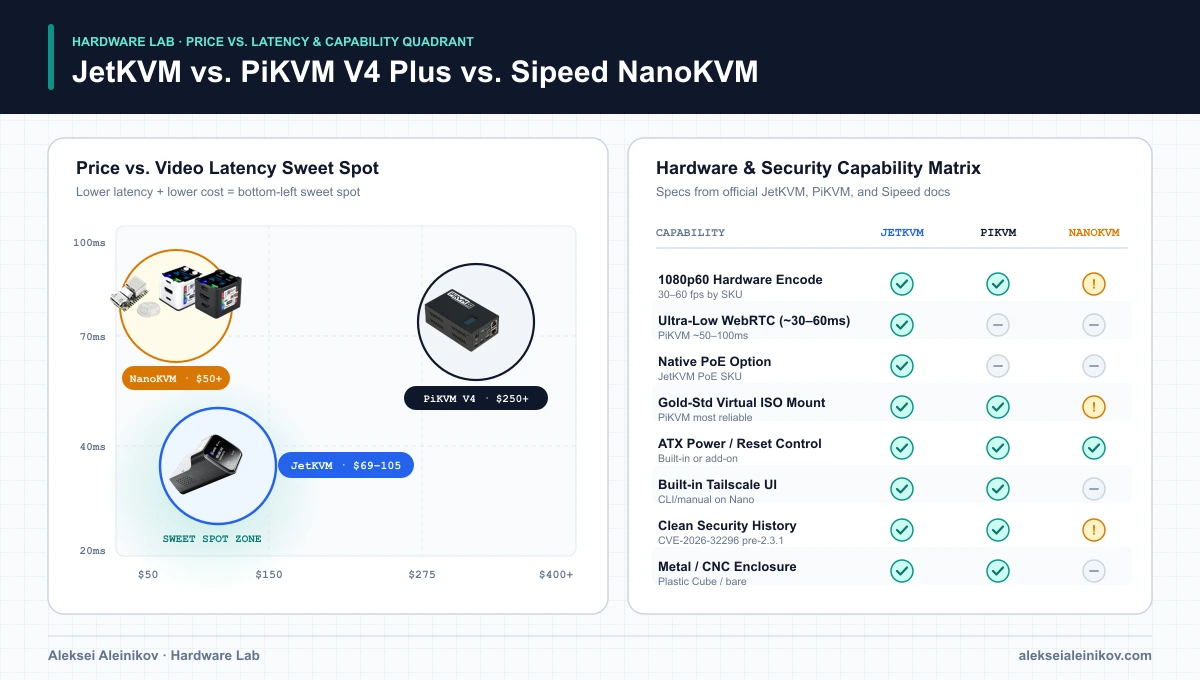
The short verdict: Buy JetKVM ($69–$105) as the default homelab daily driver for WebRTC speed, metal build quality, and built-in Tailscale. Buy PiKVM V4 ($250–$400+) if you depend on reliable remote ISO mounting (Virtual Media) and a full Linux stack. Buy NanoKVM ($50–$70) only for non-critical nodes behind a strict management VLAN and updated to firmware >= 2.3.1.
Official Lineup & Specs at a Glance
Each device targets a very different hardware budget and software maturity level:
| Specification | JetKVM | PiKVM V4 Plus / Mini | Sipeed NanoKVM (Cube / PCIe) |
|---|---|---|---|
| Processor / SoC | Rockchip RV1106G3 (ARM Cortex-A7) | Raspberry Pi CM4 (Quad Cortex-A72) | Sipeed LicheeRV Nano (RISC-V / ARM) |
| OS Stack | Open-source Buildroot Linux | Mature PiKVM OS (Debian / Arch) | Custom embedded Linux |
| Video Capture | 1080p @ 60 fps (H.264 / H.265) | 1080p @ 50–60 fps | 1080p @ 30–60 fps (model-dependent) |
| Typical Latency | 30–60 ms (WebRTC) | 50–100 ms | 60–100 ms |
| Power Options | USB-C or native PoE variant | 12V / 5V USB-C | 5V USB-C or internal PCIe header |
| ATX Power Control | Optional ATX extension board | Built-in on official V4 units | Optional add-on / PCIe variant |
| Virtual ISO Media | Supported | Gold-standard / most mature | Basic / limited |
| Typical Street Price | $69 – $105 USD | $250 – $400+ USD (DIY $150+) | $50 – $70 USD |
1. How an IP-KVM Actually Works
Software tools like SSH, VNC, or RustDesk sit inside your operating system. If a ZFS pool fails to import, GRUB hangs, or you lock yourself out of ufw on a Proxmox or TrueNAS Scale home server, software tools cannot help.
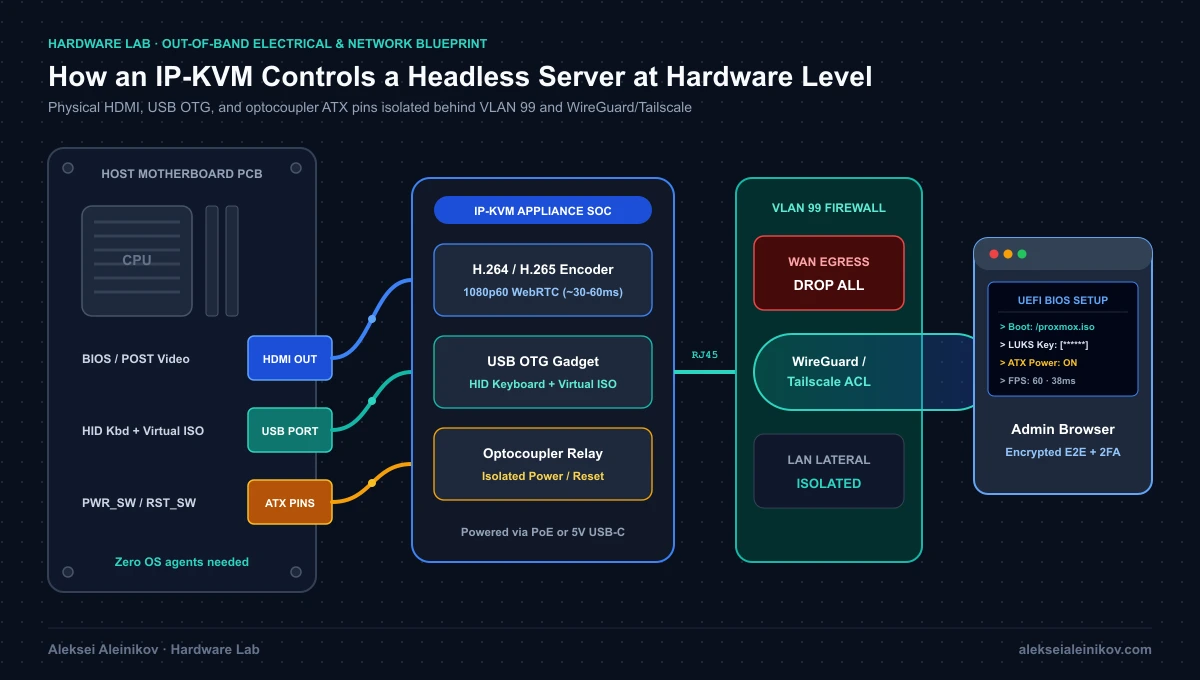
An IP-KVM sits completely out-of-band:
- Video Capture: Plugs into the server’s HDMI port and encodes BIOS, POST, and OS frames into a live browser stream.
- USB Gadget Emulation: Plugs into a USB port on the host and presents itself to the BIOS as a real physical keyboard, mouse, and optionally a virtual USB flash drive (Virtual Media).
- ATX Power Control: An optocoupler extension board wires into the motherboard’s
PWR_SWandRESET_SWheader pins so you can force-power-cycle a kernel-panicked node remotely.
2. JetKVM vs PiKVM vs NanoKVM: Where Each Tier Wins
JetKVM: The Modern Daily Driver
JetKVM disrupted the DIY PiKVM market by shipping a CNC zinc-alloy enclosure, crisp 30–60 ms WebRTC streaming, and first-class integrations for Tailscale, MQTT, and Home Assistant at roughly a third of PiKVM V4’s price. If your primary job is entering LUKS disk-encryption passphrases, tweaking BIOS settings, and rescuing hung nodes, JetKVM is the cleanest plug-and-play choice.
PiKVM V4: The Feature & Reliability Standard
PiKVM remains unmatched when you treat remote OS installation as a routine workflow. Backed by a quad-core Raspberry Pi CM4 and years of PiKVM OS hardening, its Virtual Mass Storage (mounting multi-gigabyte Linux/Proxmox ISOs cleanly across picky UEFI firmwares), serial console support, and official V4 Plus hardware polish justify the $250–$400+ price tag in labs where uptime and recovery speed matter more than saving $150.
Sipeed NanoKVM: Cheap Hardware, Heavy Caveats
At $50–$70, the Sipeed NanoKVM (available as a tiny Cube, bare board, or internal PCIe card) is tempting for multi-node homelabs. However, independent binary and hardware audits revealed why ultra-cheap management appliances require scrutiny before plugging them into a trusted network.
3. Security Audit: Why Cheap IP-KVMs Need Zero-Trust Isolation
Never treat an IP-KVM like a passive HDMI cable. Because it emulates a physical keyboard and USB storage device directly attached to your server, anyone who compromises the IP-KVM owns the server.
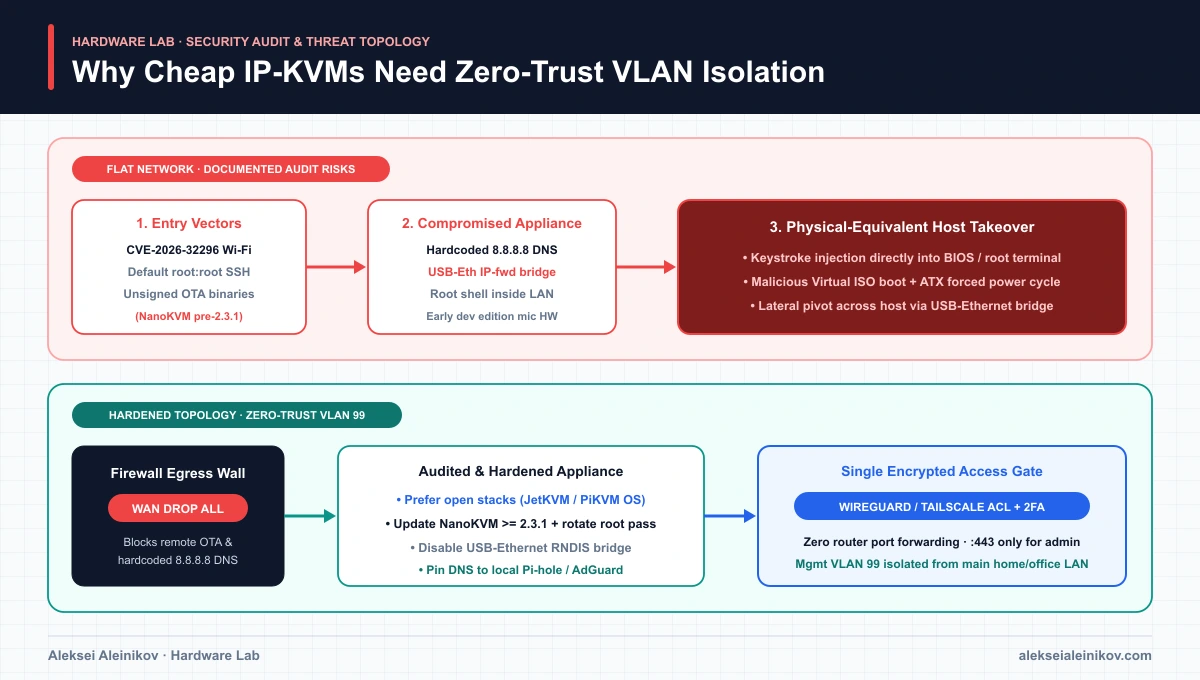
Independent security analyses (including Tom’s Hardware and published advisories) documented several serious issues on early/pre-2.3.1 NanoKVM builds:
CVE-2026-32296: An authentication bypass affecting NanoKVM firmware prior to2.3.1(patched late December 2025) that exposed Wi-Fi configuration endpoints without proper authorization.- Credentials & Unverified Updates: Earlier builds shipped with default
root:rootSSH access, hardcoded secrets, and over-the-air updates fetching unverified binaries from remote servers. - Hidden Bridges & Network Surprises: Audits flagged hardcoded
8.8.8.8DNS lookups (bypassing local DHCP DNS), an active USB-Ethernet IP-forwarding bridge to the host, and even an undocumented microphone on early developer editions.
The Bottom Line
- Pick JetKVM ($69–$105) if you want the best modern balance of price, metal build quality, PoE, WebRTC responsiveness, and native Tailscale.
- Pick PiKVM V4 ($250–$400+) if you frequently mount remote ISOs to reinstall OSes or want the most battle-tested open-source KVM ecosystem.
- Pick NanoKVM ($50–$70) only if budget or an internal PCIe form factor is paramount — and lock it inside an isolated management VLAN with updated firmware (
>= 2.3.1).
Related reading for building and securing your home server lab: